
Eyeliner can help your eyes stand out or look more extensive, and it can even change their shape. Even if you’ve never used eyeliner before, it just takes a little practice to take your makeup to the next level!
Method 1 – Choosing a Liner
-
Pencil Eyeliner
Use a pencil liner for a natural look or easy smudge. Pencils are easy to apply as you use them just like you would any other pencil. You can casually apply the pencil for a refined, natural look, or you can smudge the pencil to create smoky or dramatic eyes. It also won’t get into your eyes as liquid eyeliners can.
- When using a pencil liner, you will to occasionally sharpen or dull the pencil.
-
Liquid liner
Liquid eyeliner creates smooth, wavy lines and an authentic look. You can find liquid eyeliner in a marker pen or a vial with a brush. To use it, draw on your lines and fill in any gaps with the second use. You can make a wide range of lines, from liquid eyeliner to pleasing, natural lines to dramatic looks.
- Liquid Liner markers are very cool to use.
- If we use a vial and brush, it might take some practice to learn how to use liquid eyeliner.
-
Gel Liner
Try gel liner if you need to draw dramatic lines. The gel liner is supplied in a pot together with a small brush. Its thicker formula looks excessive for dramatic looks like cat eyes and wings. The brush makes it easier to use.
- You can use other brushes with your eyeliner. You may find that an angled brush is best for applying the liner.
- Make sure to clean the brush regularly to prevent eye infections.
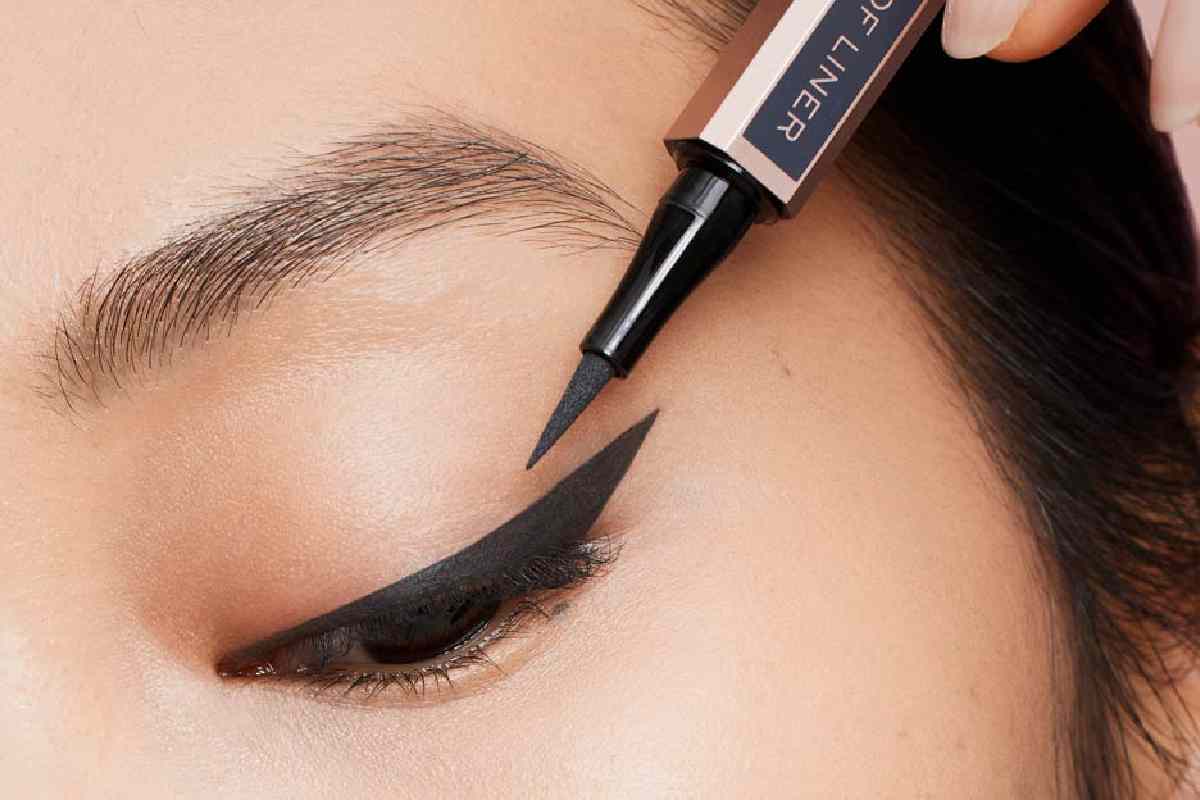
Method 2 – Applying Liquid Liner
- Shake the liner. To make sure the liquid liner is mixed well, you need to shake the bottle. Make sure the lid is closed first, and then shake the liquid liner for a few seconds. When you’re done, unscrew the cap and pull the brush out of the bottle.
- If the brush has too much liner, wipe it over the edge of the liner bottle.
- Start in the middle. Place the brush beside your upper lash line to be as close to your lashes as possible. Then start applying the eyeliner on the upper lash line. Move to the outer edge of the lash line.
- If you are worried about having an even line, you can first draw the line of your upper lashes with a pencil, then draw that line with a liquid pencil.
- Fill in the gaps. Once you have finished doubling the outer corner, line up the inner edge of your upper lash line and connect that line with the first line you finished. Use small strokes to attach your lines and fill them in as needed to have a solid and even line on the upper lash line.
- If you mark a mistake, dip a cotton swab in a little liquid oil and use the tip of the cotton swab to secure it. You can wipe off excess liner or even a crooked edge.
- Follow the lower lash line for a winged look. Wings are optional with the liquid liner, but adding attachments can exaggerate your look. If you need to create a winged look, follow the curve of the outer lash line upward from the outer corner of your eyelid. Then fill the wing as needed.
- Try to create just a small wing if you don’t want to look too dramatic, or go for a longer wing for a dramatic look.
- You can use the brink of a business card to help you form a straight line for the wing. Place the business card against the outer edge of your eyelid at an angle and trace along the edge with the liquid pencil.
- You can likewise use duct tape to create wings. Place duct tape on your lower lash line so that they are angled. The tape must be right up against the outside edge of your lower lash line and extend to your eyebrows. Glue both sides before applying the liner to ensure even application. You can tilt the strip as much or as little as you want, but keep in mind that a steeper tilt will look more intense. If you want a less dramatic look, decrease the amount of tilt in your band.
Method 3 – Applying Pencil Liner
- Sharpen or blunt your liner if necessary. The sharpness of your eyeliner pencil will affect the appearance of the eyeliner. You can create a thin, precise line by sharpening your pencil, or you can create a more rounded and thick line by blunting the pencil.
- To sharpen the pencil, use an eyeliner sharpener to make the pencil as sharp as you want.
- To dull the pencil, gently rub the tip of the pencil on a tissue until it reaches the desired level of dullness.
- Prepare your pencil liner. To ensure that your pencil liner applies smoothly, it helps to set it at the right temperature. If your liner is hard, you might want to warm it up. If it’s soft, you might want to cool it down. A cooler pencil will provide a smoother, lighter application. A warm pencil, which will be soft, will give a darker and more pigmented appearance.
- To warm up your liner, turn your hairdryer to its highest setting and point it at your eyeliner for a few seconds. This will soften the liner enough to give it a gel-like consistency. Then test the liner on your wrist before applying it to your eyes.
- To cool your liner, try placing it in the freezer for about 10 minutes before applying it. This will help prevent the pencil eyeliner from crumbling.
- Hold the outer corner of your eyelid. Place your fingers on the outer edge of the upper lash line and gently pull outward so that the eyelid is taut. This will help you create a straight, even line along the upper lash line. You can also close your eyelid while stretching it.
- Raise your eyebrows so that your eyelid does not block your lash line at all.
- It may also be helpful to rest your elbow on a table or countertop to keep your hand steady.
- Start at the inside corner and work across. Start lining the inner corner of your eyelid and move to the outer edge of your eyelid. Make sure to go slow and use short strokes to create an even line.
- If you want your eyes to appear more extensive and more open, you can consider applying a lighter color just to the inner corner of the upper lash line. [13] For example, you can use a cream-colored liner on the inside corners and a brown-colored liner on the outside corners. Use an angled brush to blend in if you are combining multiple colors.
- Consider a tight lining for a more natural look. If you want a really natural look, then you might want to consider squeezing your eyes. To tighten your eyes, apply eyeliner only to the spaces between your lashes on your upper eyelid. It will accentuate your eyes without creating a dramatic line.
- You can tighten your upper and lower lash line.
- For an even more natural look, try lining your eyes with a neutral shade, like light brown.
- Draw the line of your lower lashes. If you decide to line your lower eyelid, place a finger on the outer edge of your lower eyelid and pull on it. Then start to apply the liner in small strokes, as you did with the upper eyelid.
- Line the entire lower lash line for a dramatic look. Lining the entire lower lash line with the upper lash line will make your eyes look even more spectacular, but it will also make them look smaller.
- Draw only the outer half of the lower lash line for a more subtle look. You can also use a lighter shade of eyeliner for the lower lashes to make the effect a little less dramatic. For example, you can use a light brown shade on your lower lash line.